Honda CR-V: Using a Track List

You can also select a file directly
from a track list on the audio display.
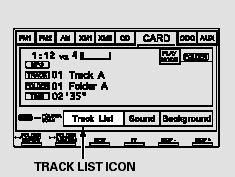
Press the AUDIO button to show the
audio display, then touch the Track
List icon. The track list menu
appears on the display.

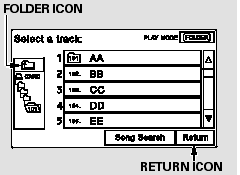
To scroll through the display, touch
the
 or
or  icon on the side of the
screen. To go back to the previous
display, touch the Return icon.
To play a file, touch its icon on the
screen. In folder mode, touch the
folder icon on the upper left of the
screen to move to the parent folder.
The current folder is highlighted in
blue.

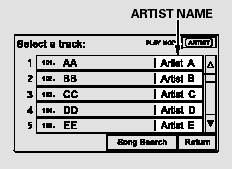
In artist mode, the artist name is also
displayed on the right side of each
selectable icon. Select the desired
file.

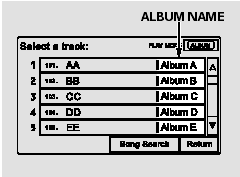
In album mode, the album name is
also displayed on the right side of
each selectable icon. Select the
desired file.
READ NEXT:
When you select ‘‘Song Search’’ from
the track list display, the song search
menu appears.
You can then select any of three
modes to search a file: Title by
Keyword, Artist, a
To play the radio when a PC card is
playing, press the AM/FM button or
touch the FM1, FM2, AM, XM1, or
XM2 icon. If a disc is in the audio
unit, press the CD/XM button or
touch the CD icon t
To remove a PC card from the audio
unit, fold back the screen by
pressing the OPEN button. Press the eject button (
)
to remove the card. If you do not
remove it from the slot, you cannot
SEE MORE:
NOTE: Information marked with an asterisk (*) applies
to the CANL line.
1. Turn the ignition switch OFF.
2. Jump the SCS line with the HDS.
3. Disconnect PCM connector A (44P), then disconnect
the HDS.
4. Measure resistance between PCM connector
terminals A36 and A37.
Is there about 95- 116 Ω
Special Tools
07HAE-PL50101 may also be used to substitute one of 07LAE-PX40100.
Mainshaft Holder
Attachment, 78 x 90 mm
Clutch Spring Compressor Bolt Assembly
Holder Handle
Oil Seal Driver Attachment
Attachment, 40 x 50 mm
Clutch spring Compressor Attachment
Bearing Installer Attachment
© 2016-2025 Copyright www.hcrv.net


 or
or  icon on the side of the
screen. To go back to the previous
display, touch the Return icon.


