Honda CR-V: Fuel Fill Door
Fuel Fill Door Adjustment
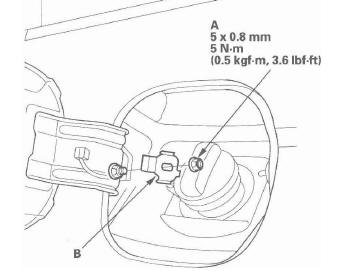
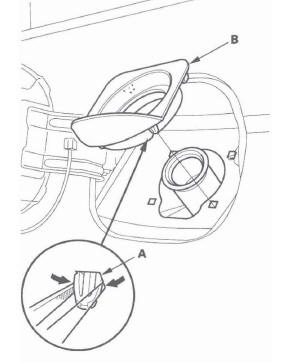
1. Remove the nut (A), then remove the open spring (B).
2. Slightly loosen the hinge mounting bolts (A).
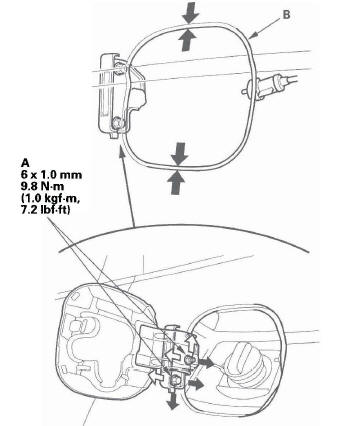
3. Adjust the fuel fill door (B) in or out until it's flush with the body, and up or down as necessary to equalize the gaps.
4. Tighten the hinge mounting bolts.
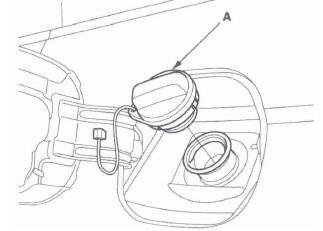
5. Check that the fuel fill door opens properly and locks securely, and check that the rear of the door is flush with the body.
6. Reinstall the open spring and nut.
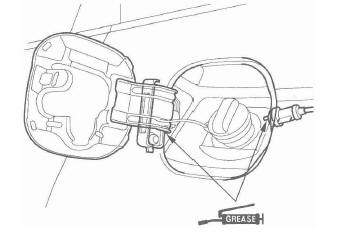
7. Apply multipurpose grease to each location indicated by the arrows.
8. Apply touch-up paint to the hinge mounting bolts and around the hinges.
Fuel Cap Adapter Replacement
NOTE: Take care not to scratch the body.
1. Remove the fuel pipe protector.
2. Remove the cap (A) by turning it counterclockwise.
3. From under the body, push out the hooks (A). Then turn the fuel cap adapter (B), and remove it from the fuel pipe.
4. Install the adapter in the reverse order of removal.
READ NEXT:
 Upper/Lower Front Grille Replacement
Upper Front Grille Replacement
NOTE: Take care not to scratch the bumper and grille.
1. Remove the front bumper.
2. Remove the clips from the back of the front grille
and release the hooks (A), then
Cowl Cover Replacement
Special Tools Required
KTC trim tool set SOJATP2014 *
* Available through the American Honda Tool and
Equipment Program; call 888-424-6857
NOTE:
Put on gloves to protect your hands.
Take care not t
SEE MORE:
MICU Input Test
NOTE:
The MICU turns on the headlights (high beams) in a dim mode for the
daytime running lights under the following
conditions:
The ignition switch is ON (II)
The headlight switch is OFF
The parking brake is released (parking brake switch OFF)
If the vehicle is equipped with an opti
Keys and Locks
The master key fits all the locks on
your vehicle. The valet key works
only in the ignition and the driver’s
door lock. You can keep the glove
box locked when you leave your
vehicle and the valet key at a parking
facility.
You should have received a key
number tag with your keys
